Modern Software Development Lifecycle – Part 2 Continuous Integration
This post is part 2 in a three-part series of posts on Software Development Lifecycle in the “Modern” development paradigm. As I explained in the previous post, I have been thinking about how to integrate client-side code into enterprise development processes. Many years ago, I was introduced to a concept called continuous integration. I even implemented it at a previous employer, it was awesome. Continuous integration is the concept that as changes are made to code they can immediately be combined and tested to make sure everything works. Then once everything checks out continuous integration tools can also handle the deployments for us. As my development has shifted from compiled code to more client-side code, I have been trying to figure out how to use the tools and processes that I have been using with client-side methodologies. I recently figured out how integrate continuous integration into my processes now. This revelation was thanks in part to the push of the SharePoint Framework. I also recently came across the fact the Visual Studio Team Services has added continuous integration capability. TFS supposedly has this feature as well. In order for this to work with our processes in SharePoint and JavaScript you will need to have a working gulp script from the previous part for these instructions to work.
Git Integration
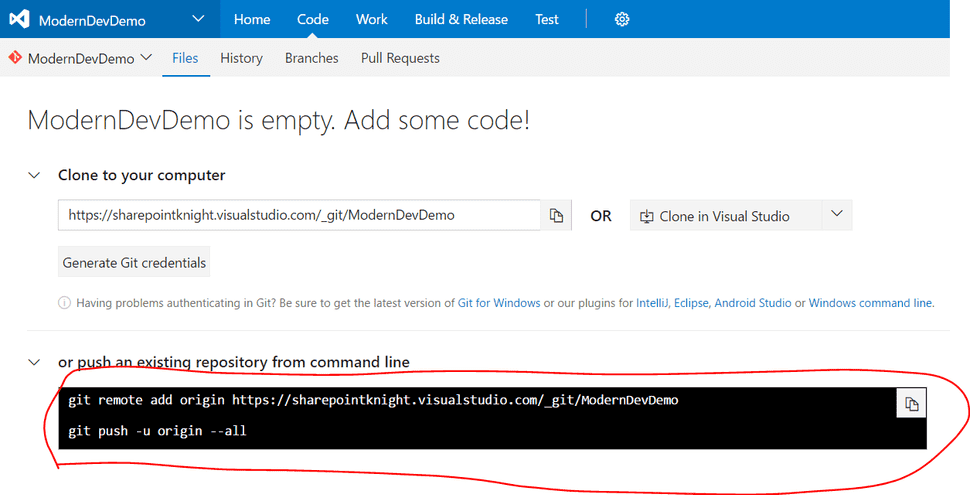
For our project, we will be using a Git repository that was created in Visual Studio Team Services. To continue from our previous project, we will be adding our project to the repository manually through a Git command. Make sure that you have created your .gitignore file for anything you don’t want included in version control. Otherwise you’ll have to run some other commands to exclude those files. We will need to run the following commands in a command prompt that has the Git tools in the path. I have added the path to the Git tools to my path so that from the Node.js prompt I can run all the commands I need.
Git works with the concept of a local and a server repository. To start we need to setup the local repository. From your command prompt that has your git tools, make sure you are in the root of your project before you run the next command. To initialize the local repository, you need to run “git init”. Once that completes we need to add our local files, to do that run “git add .”. Then we need to commit our changes, adding our files, to the repository. When we commit Git requires a comment so we need to add a comment. This can be done in one command “git commit -m ‘Initial Commit’”. Now that our local repo is ready, we can tell Git about our server location. To do this we need to give it an origin, through “git remote add origin https://remoterepo.visualstudio.com” The repo URL can be retrieved from VSTS after you create your project. Then we need to push our code up to the server. This is done with the following command “git push -u origin –all”
From your project click on the code tab.
The next page shows you the commands that you will need even. There are even options for making sure you have the credentials setup.
Now we are ready to start working on automating our process.
Continuous Integration
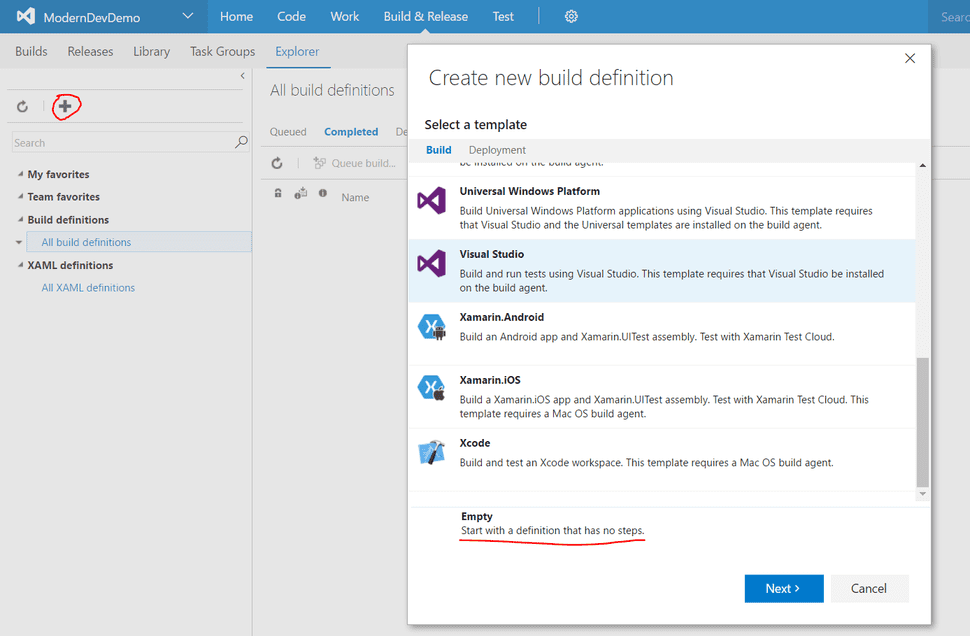
The rest of our time will be spent under the Build & Release tab. From here we can automate our builds and once we have those setup, we can setup the automated release with approval. First, we will need to create a build definition. So we click on the green plus symbol. There are some predefined build definitions but what we need is an empty build definition.
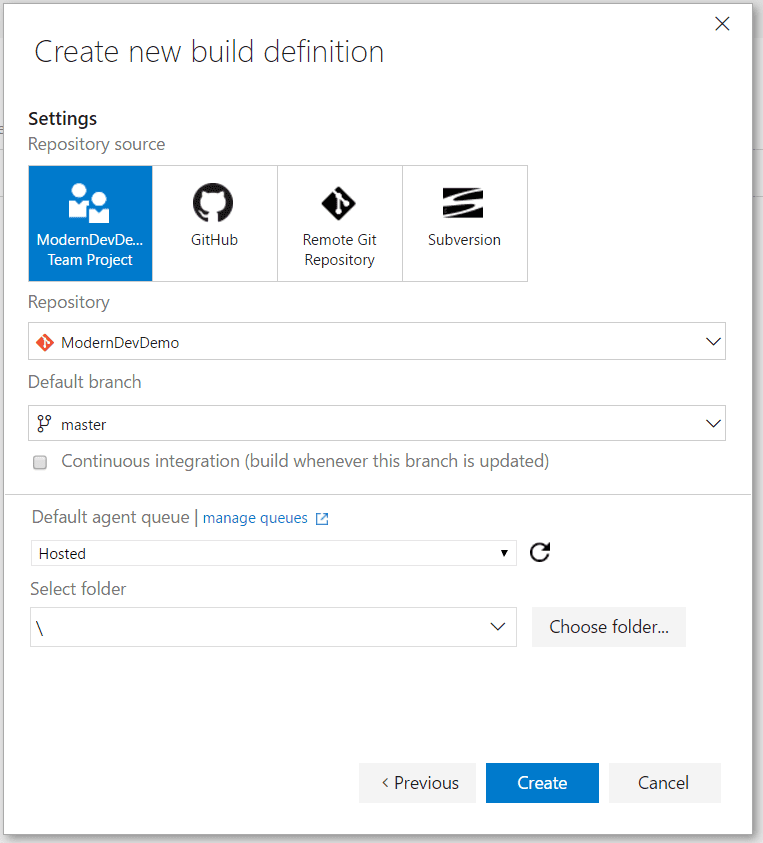
Click on “Empty” and then click next. We are now prompted with different options for our build. What we select will also control our options for triggering our build.
For our purposes, we will stick with the defaults but it is worth noting that we can have different queues for Agents. As part of VSTS we get an amount of time included for our builds. So, if we use hosted agents we are going against that time. You can also create your own agents including Mac agents if you are doing mobile development. We will now click on create to create our build, then we’ll need to add some steps to our build.
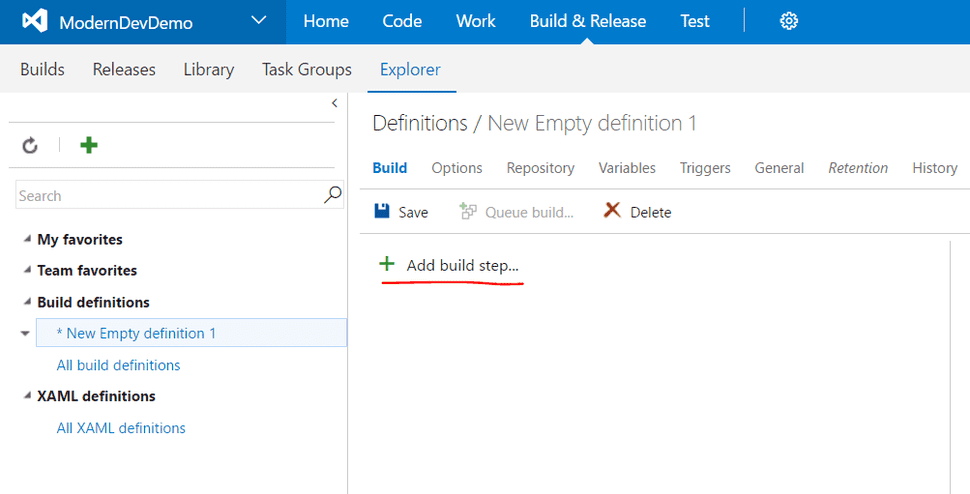
Once our build is created we are shown our build. There are currently no steps in our build definition. Also, our build definition doesn’t have a name yet. After we add our steps and save we will give it a name.
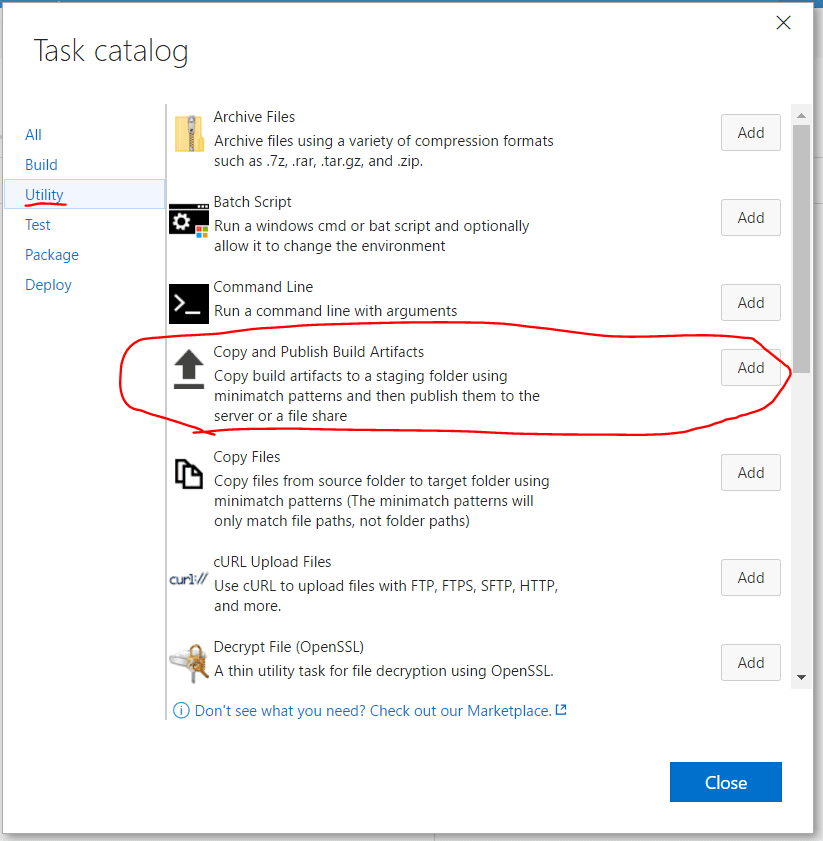
Click add build step and we prompted with a list of build steps. If you need to do some compilation through your gulp file first, whether you have some TypeScript or want to do some minification, there is a build step for Gulp. There is also a build step to run an NPM command. For our purposes since we are using basic code with no compilation or extra steps required, we are just pushing out our code. If you need these steps just add them. We will discuss how to configure them as part of our deployment step. Now, since we can run a Gulp script from our build we could handle the deployment directly from our build but we get some cool features by doing it as part of our Release. The key from our build, in order to make the release work, is we have to publish artifacts. Under the Utility group on the left there is a task called “Copy and Publish Build Artifacts” We need to add one of these after all of our build tasks. As mentioned earlier we are not building anything so we just need this step.
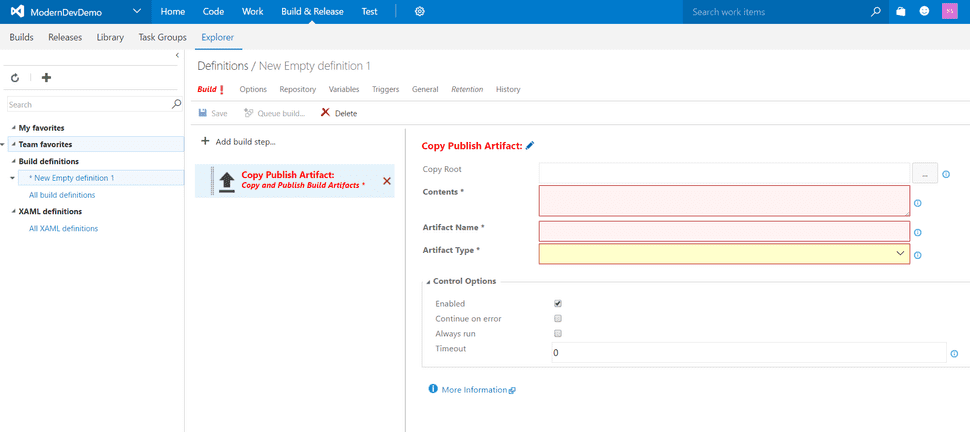
Click “Add” to add this task, step, to our build definition and click “Close” so we can configure it. Starting out our build is flagged with an exclamation meaning that the tasks are not configured properly.
We need to configure the required fields that are marked in red. The contents field is where we define which files will be included as part of our build. Each definition is required to be on its own line. The system uses minimatch patterns. To copy all the files in our src folder we can use the following pattern, “src\**\*”. This will copy all files and all folders under the src folder. Next we will need our gulpfile and config.json to make sure we have everything we need for our deployment. Our Contents field should this in it.
src\**\*
gulpfile.js
config.json
Now we need to give our artifact a name. It doesn’t really matter what we use. We are going to call ours Modern Dev to match our theme. Next, we need to set the artifact type, this determines where VSTS will copy the files for our artifact. If we select server then the files will stay on the build agent. We can also select file share and we can enter a file share that is accessible to the agent. Once we have entered the information we can now save our build definition. After clicking on Save we will be prompted to provide a name for our build definition. Provide a name and click save. Now we have our build definition ready we have a few options for triggering the builds. If we don’t configure a trigger, then we have to manually start each build. To set the triggers click on the “Triggers” tab. Since we are using the Git repo connected with the project we have two options “Continuous Integration” and “Scheduled”. Continuous Integration builds will start automatically after the code is checked in. Scheduled is like it sounds a build will start on a schedule.
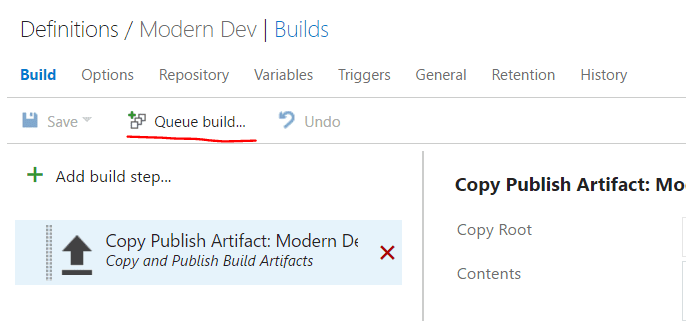
Now that our build is configured we can click on “Queue Build” to start a build to make sure everything is configured properly.
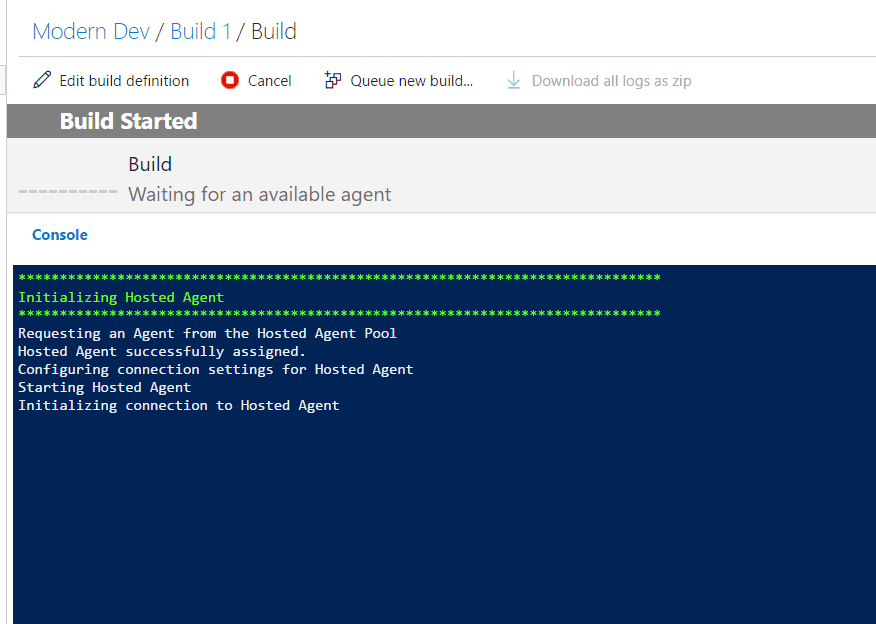
We will be prompted for what variables and what queue to place our build in. Click “Ok” and we will be presented with a live updating status about our build.
If this fails, we will need to resolve the errors before we can continue.
Release Automation
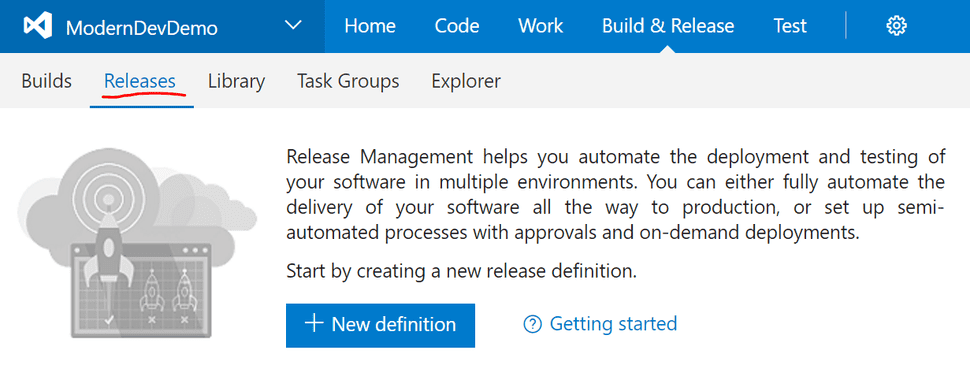
In order to continue you need to have a successful build from the previous step. We need this because to configure our release the artifacts need to be there so we can select the correct options. We’ll click on the releases tab to view release definitions that have been defined. Starting out you should be greeted with a screen like this one.
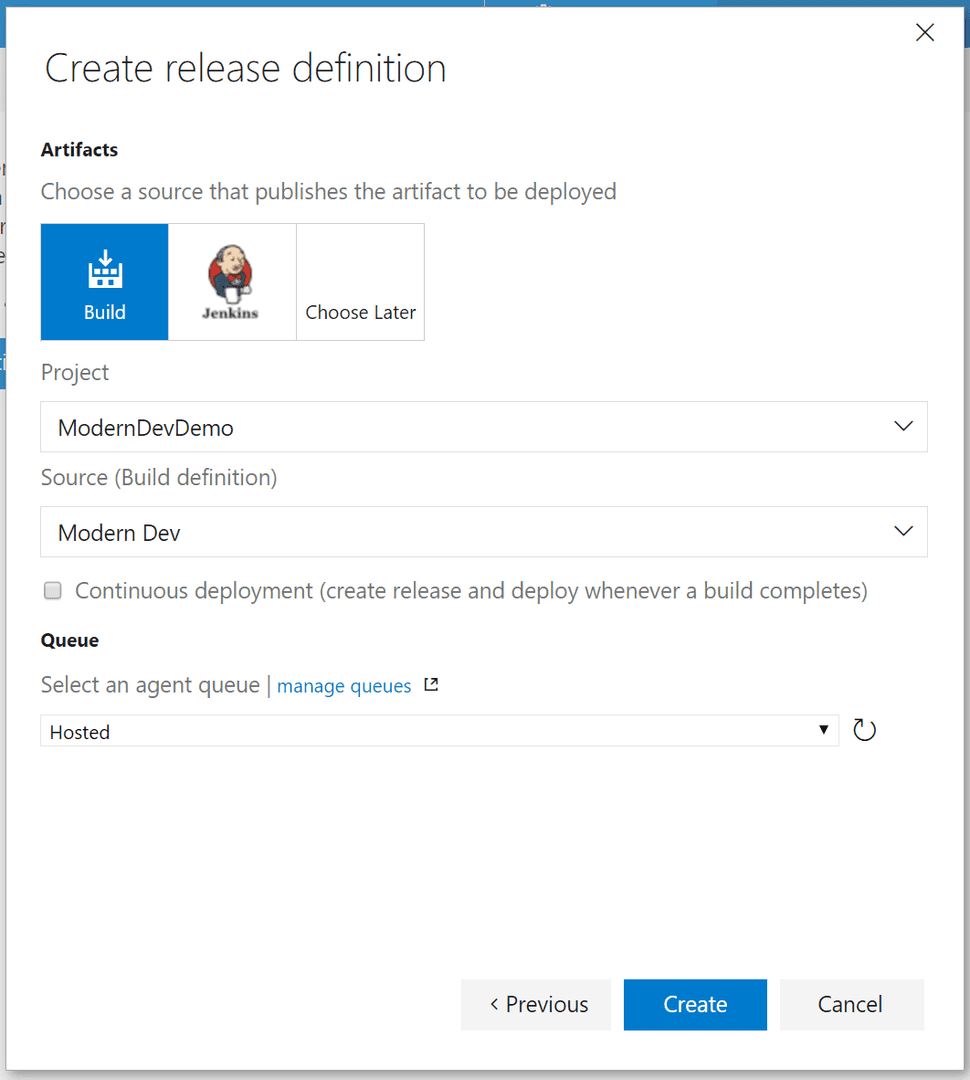
Click on New definition to start the process of defining our first release definition. Yet again we are going to select Empty for our template. We are now presented with a screen asking what the source of our release will be. If we configured everything then the information from our build will be pre-filled for us.
We have the option here as well to select a queue as well as if we want to automatically create a deployment when a build is successfully created. Go ahead and click Create.
Once this completes we are taken to the screen to define our environments. Environments can be anything we want to define them as. They could be dev, test, and prod or dev, integration, test, QA, staging, and prod. We have a lot of flexibility on what is deployed and under what conditions those deployments happen. For now, I am going to stick with one environment. For each environment, we can define pre-deployment approvers to approve before the deployment happens and post-deployment approvers that need to approve that the deployment worked correctly. There is even the option to not allow the person launching the build to be able to approve the deployment, for those organizations with these types of policies.
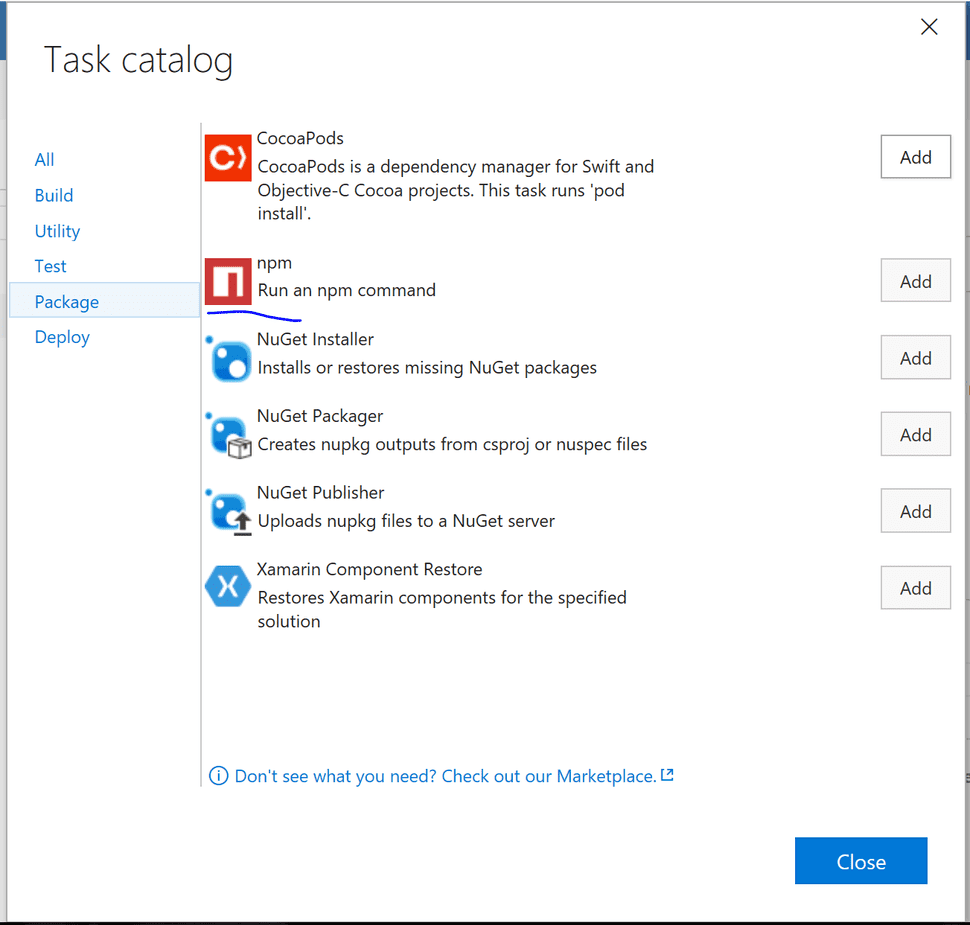
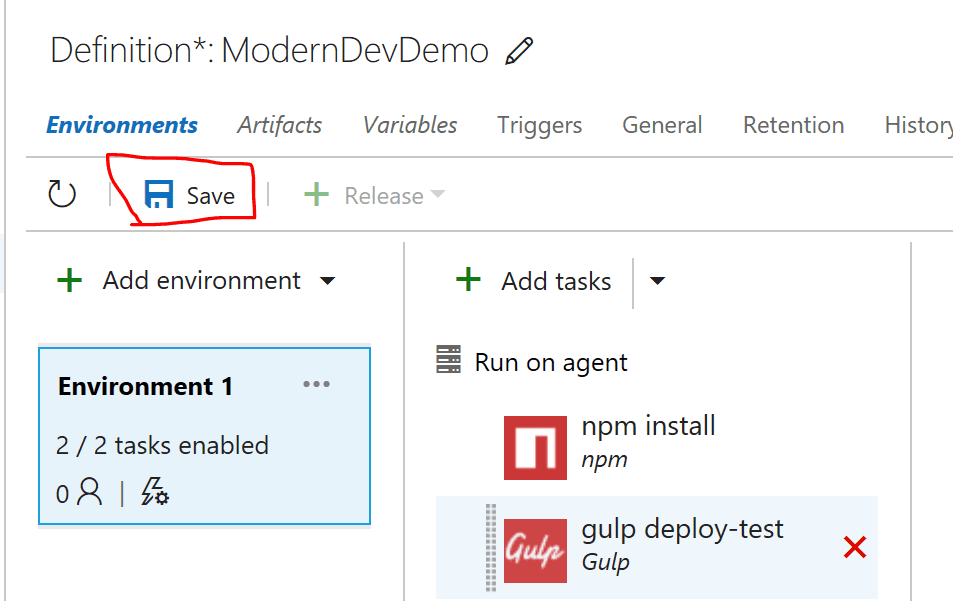
Once we have setup our environments we can define the tasks for each environment by clicking on the environment we want to work with. As long as we have setup the artifacts correctly from our build all we have to do is prepare our tasks. To make sure everything is ready I am going to add two tasks. The first is npm install to make sure all of our dependencies are setup on our agent. To do this click on the environment and click “Add Tasks”. Under the Package group on the left select “npm” and click add.
While we have this window open, we can add our second task. This will be a gulp task where we will call our deployment gulp task. Select the “Build” group and click “Add”, on the Gulp task. Now we can click close and configure our tasks.
By default, when we add the npm task it adds an install task. Here you can stick with the default and have it install everything or you can specify the packages you want installed. Installing only the packages you need is the preferred approach so you don’t waste build time. If we are using the same deployment approach that was discussed in the previous article in this series then we can use enter the following into the arguments option, “gulp gulp-util Fabian-Schmidt/gulp-sharepoint-sync”. This will make sure our gulp task has everything it needs.
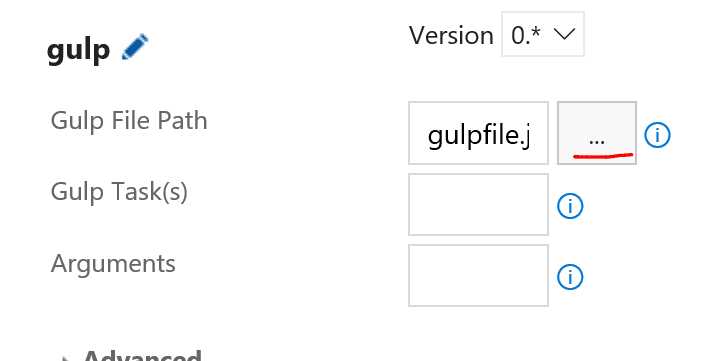
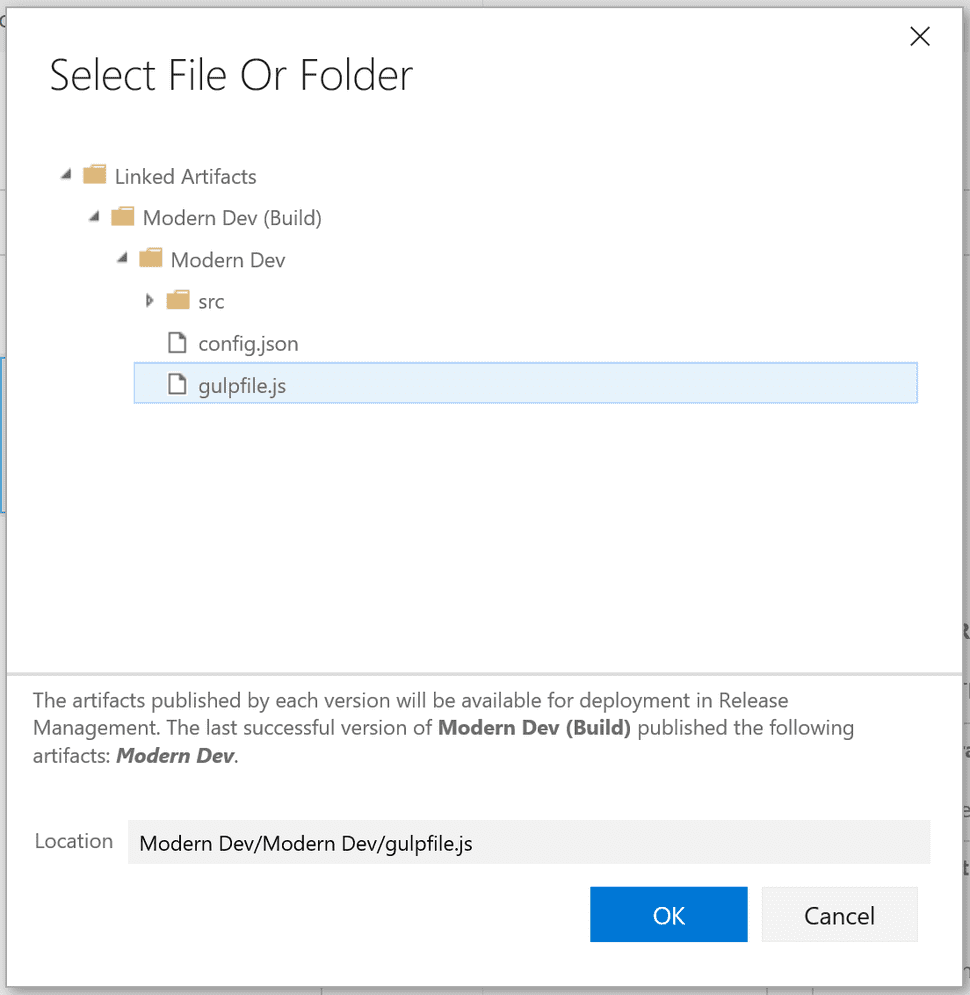
Now we can work on our gulp task. Verify that the task is pointing to the correct gulp file by clicking on the … next to the gulp file path box.
This will show the artifacts published from our build. Navigate and find your gulpfile in the artifacts. Make sure you click on the gulpfile and then click “OK”
Next, we’ll need to specify the gulp task that we want to run. I am calling my environment “Test” so I can going to use the “deploy-test” gulp task. Now click save to save our release definition.
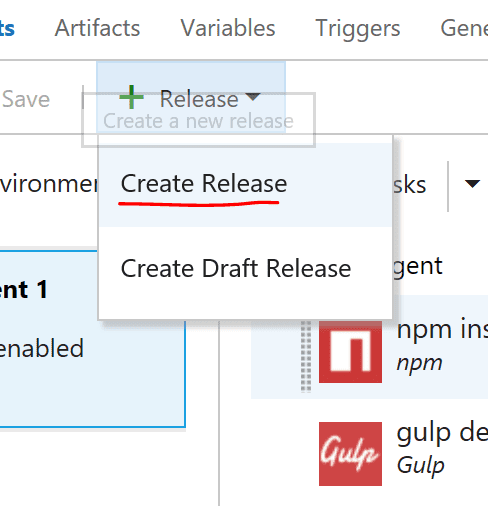
Now we are ready to go and start using our release. If we have a successful build we can test our Release by clicking on the release drop down and selecting create release. We will then be prompted to select the build, we can also enter a description of the release. When you are ready click “Create”
Summary
After completing these steps your release is ready, make sure you have defined the correct triggers unless you want to manually trigger the release. This same setup will work for deploying artifacts for script/content editors or for SharePoint Framework client-side web parts.

